How I Built a Home VPN with a Raspberry Pi and Tailscale
Why I built it
Being a Dane living abroad makes it hard to watch Danish TV. I didn't like using commercial VPNs because of excessive tracking and having one more monthly plan. Additionally, some streaming providers block IP ranges from known VPN services, and I don't want to be part of this whack-a-mole-just-switch-to-a-different-IP game. I needed wanted something that just works. This also gave me the opportunity to become familiar with how Raspberry Pi's work.
Goal
Use the Tailscale app on my Apple TV to have the Apple TV use my VPN in Denmark. No getting out of the couch. I just want to use the remote!
Hardware
We really only need two pieces of hardware, total price: ~75 Euros. If you include the optional parts, it's about ~100 Euros
- Raspberry Pi 4 (a small cheap computer-on-a-printed-curcuit-board), Price: 50-60 Euros. A Raspberry Pi 3 (25-30 Euros) is also fine, but at the time of writing, the latest Raspberry Pi is 5, so Raspberry Pi 3 parts are not as easy to find. I just went for the 4 because it was plenty of power and easy to find parts.
- MicroSD card. Anything over 16 GB is probaby fine. I got a 32 GB for 13 Euros. The micro SD card is essentially the Pi's hard disk. It's fine for stuff like this, but I read that if you need to do more writing and reading from the disk, a proper SSD is way more reliable 🤷♂️
- [Optional] PoE (Power over ethernet) HAT, Price: 20-25 Euros
- [Optional] Housing/case for the Raspberry Pi, Price ~5 Euros
Other very useful hardware:
- A USB keyboard and mouse, to control the Raspberry Pi during setup. At the very least, a USB keyboard. The Raspberry Pi does have Bluetooth, but until you get your Bluetooth keyboard or mouse connected, it's a little bit hard to really do much. There are probably some tricks to still control the Pi without a USB-keyboard if you really wanted to.
- A Micro HDMI cable to connect the Raspberry Pi to a display. You can also connect to it remotely from your laptop or desktop, but again, this €10 cable just makes it a lot easier. And then you have one more cable in your cable drawer. You're welcome!
Plan
- Buy a Raspberry Pi 4
- Install Tailscale on the Raspberry Pi. Configure and test it.
- Send the Raspberry Pi to my brother-in-law in Denmark.
Tailscale is an awesome service that allows you to create your own personal network (tailnet) so that your devices, connected to that tailnet, can see and talk directly to each other without going through a central server. You just install the Tailscale app or daemon on your devices and, bam, all devices can all talk directly to each other - no slow down, no middle-man.
My brother-in-law lives in Denmark, he has a symmetric 1 Gb/s up and down connection, and he doesn't mind sharing up to 50 Mb/s with me. Additionally, it's always helpful that he's kind of a nerd like me, should the Raspberry Pi ever need some physical TLC!
1. Prep the Pi
I got the 2 GB memory Raspberry Pi, and I followed the instructions from this YouTube clip. This is pretty much equivalent to installing Windows with a CD-rom like in the olden days before the internet. You just follow some steps, and 10-20 minutes later, your Raspberry Pi operating system is up and running.

2. Install Tailscale
Tailscale was the part that removed most of the traditional VPN pain.
curl -fsSL https://tailscale.com/install.sh | sh
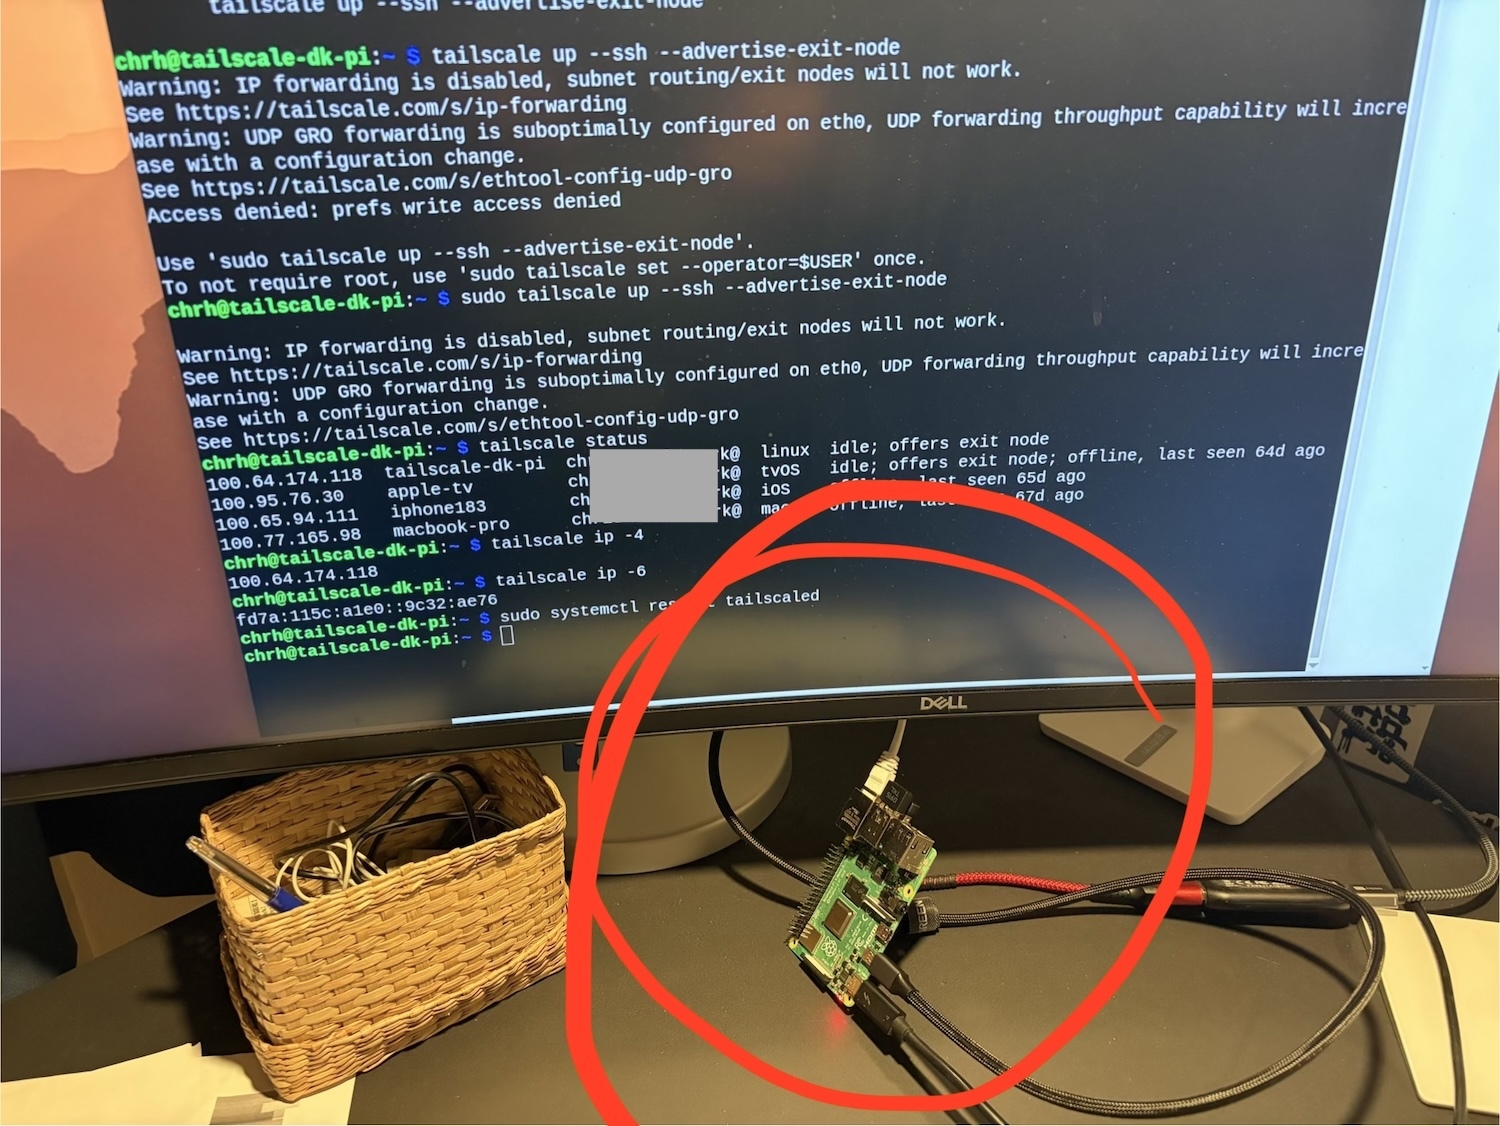
sudo tailscale up --ssh
That gave me two things right away:
- The Raspberry Pi joined my tailnet
- I could SSH to it from my laptop or even an SSH app on my phone, even when they're not on the same network, because they are once they join the Tailscale tailnet network
Isn't Tailscale awesome? I didn't know much about Tailscale before this project. Only used it once to test out VibeTunnel, it is just so easy to connect your devices.
I also configured Tailscale to start up when the Raspberry Pi booted up – it has to run as some kind of daemon. Just google it.
3. Turn the Pi into an exit node
To make the Pi behave like a VPN endpoint, you need to toggle "Exit Node" on for the device in the Tailscale admin panel. You could also do this directly from the command line on the Raspberry Pi with a command like:
sudo tailscale up --advertise-exit-node --ssh
This "advertise as exit node" is important in this setup: the Pi is not just another node/device on the tailnet. It becomes the machine other devices can use as their internet egress (exit node), so that the traffic from those other nodes can go through the Pi, should they choose to do so.
Make Tailscale auth key not expiring
Each device on Tailscale gets an authentication key that it uses to authenticate itself on the tailnet. By default, this key expires after a few months. I wouldn't risk that this key expires since I didn't have direct access to the Pi. I turned off key-expiration for the PI in the Tailscale Admin Panel. As long as I can SSH into the Pi remotely, I can obviously refresh the key. If for some reason I should forget to do that, or the Pi goes offline for a long time for whatever reason and then comes up after being expired, I still can't connect to it if the key is expired. So, turn off key expiration for the Pi in the Tailscale admin panel
4. Test it, test it
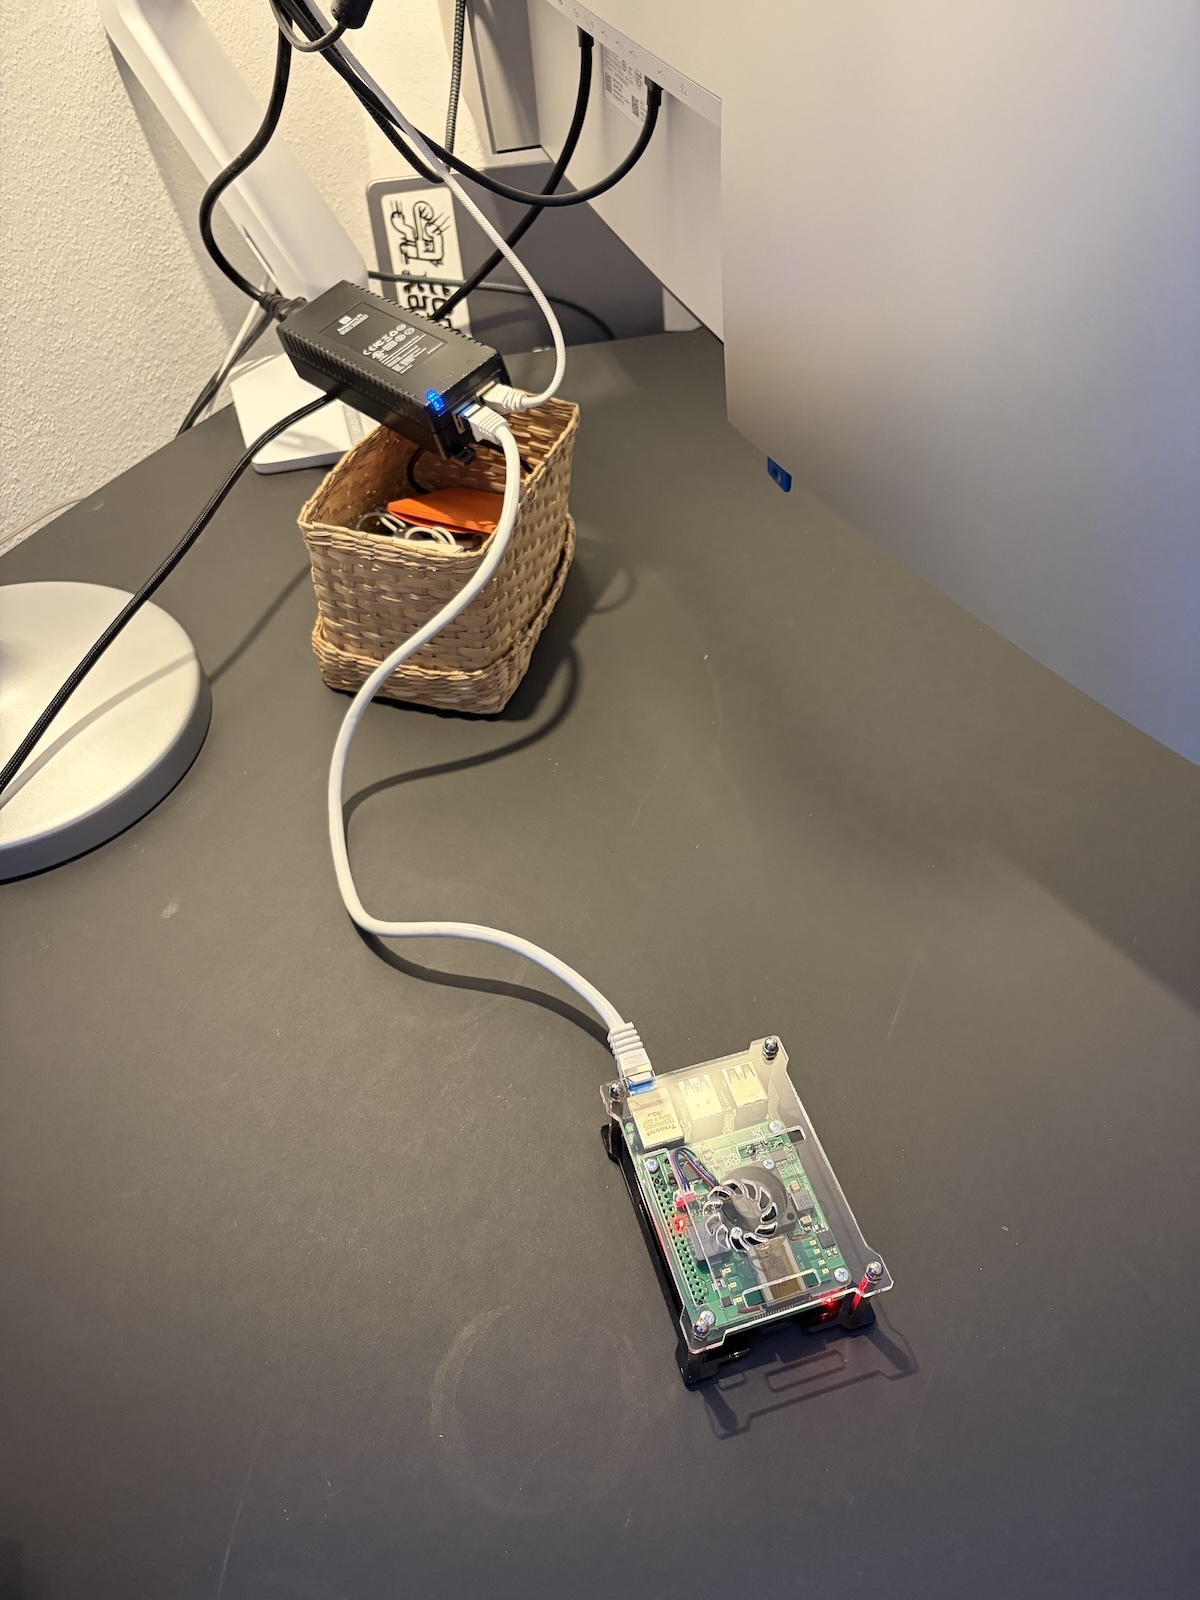
Since this was going to be in another country, I had to make sure that it just worked. As I mentioned above, the Pi would be powered over the Ethernet cable, so that had to be tested. I obviously unplugged and replugged and unplugged and replugged the ethernet cable many times to see if it would automatically boot up, join the Tailscale network, and advertise itself as an exit node.
I then left it on the table connected for about a week just to see if it would go to sleep or shut down or something. And then I did the same again: unplug and replug. It kept coming back online. Not the most scientific test, but I felt I'd done my homework.
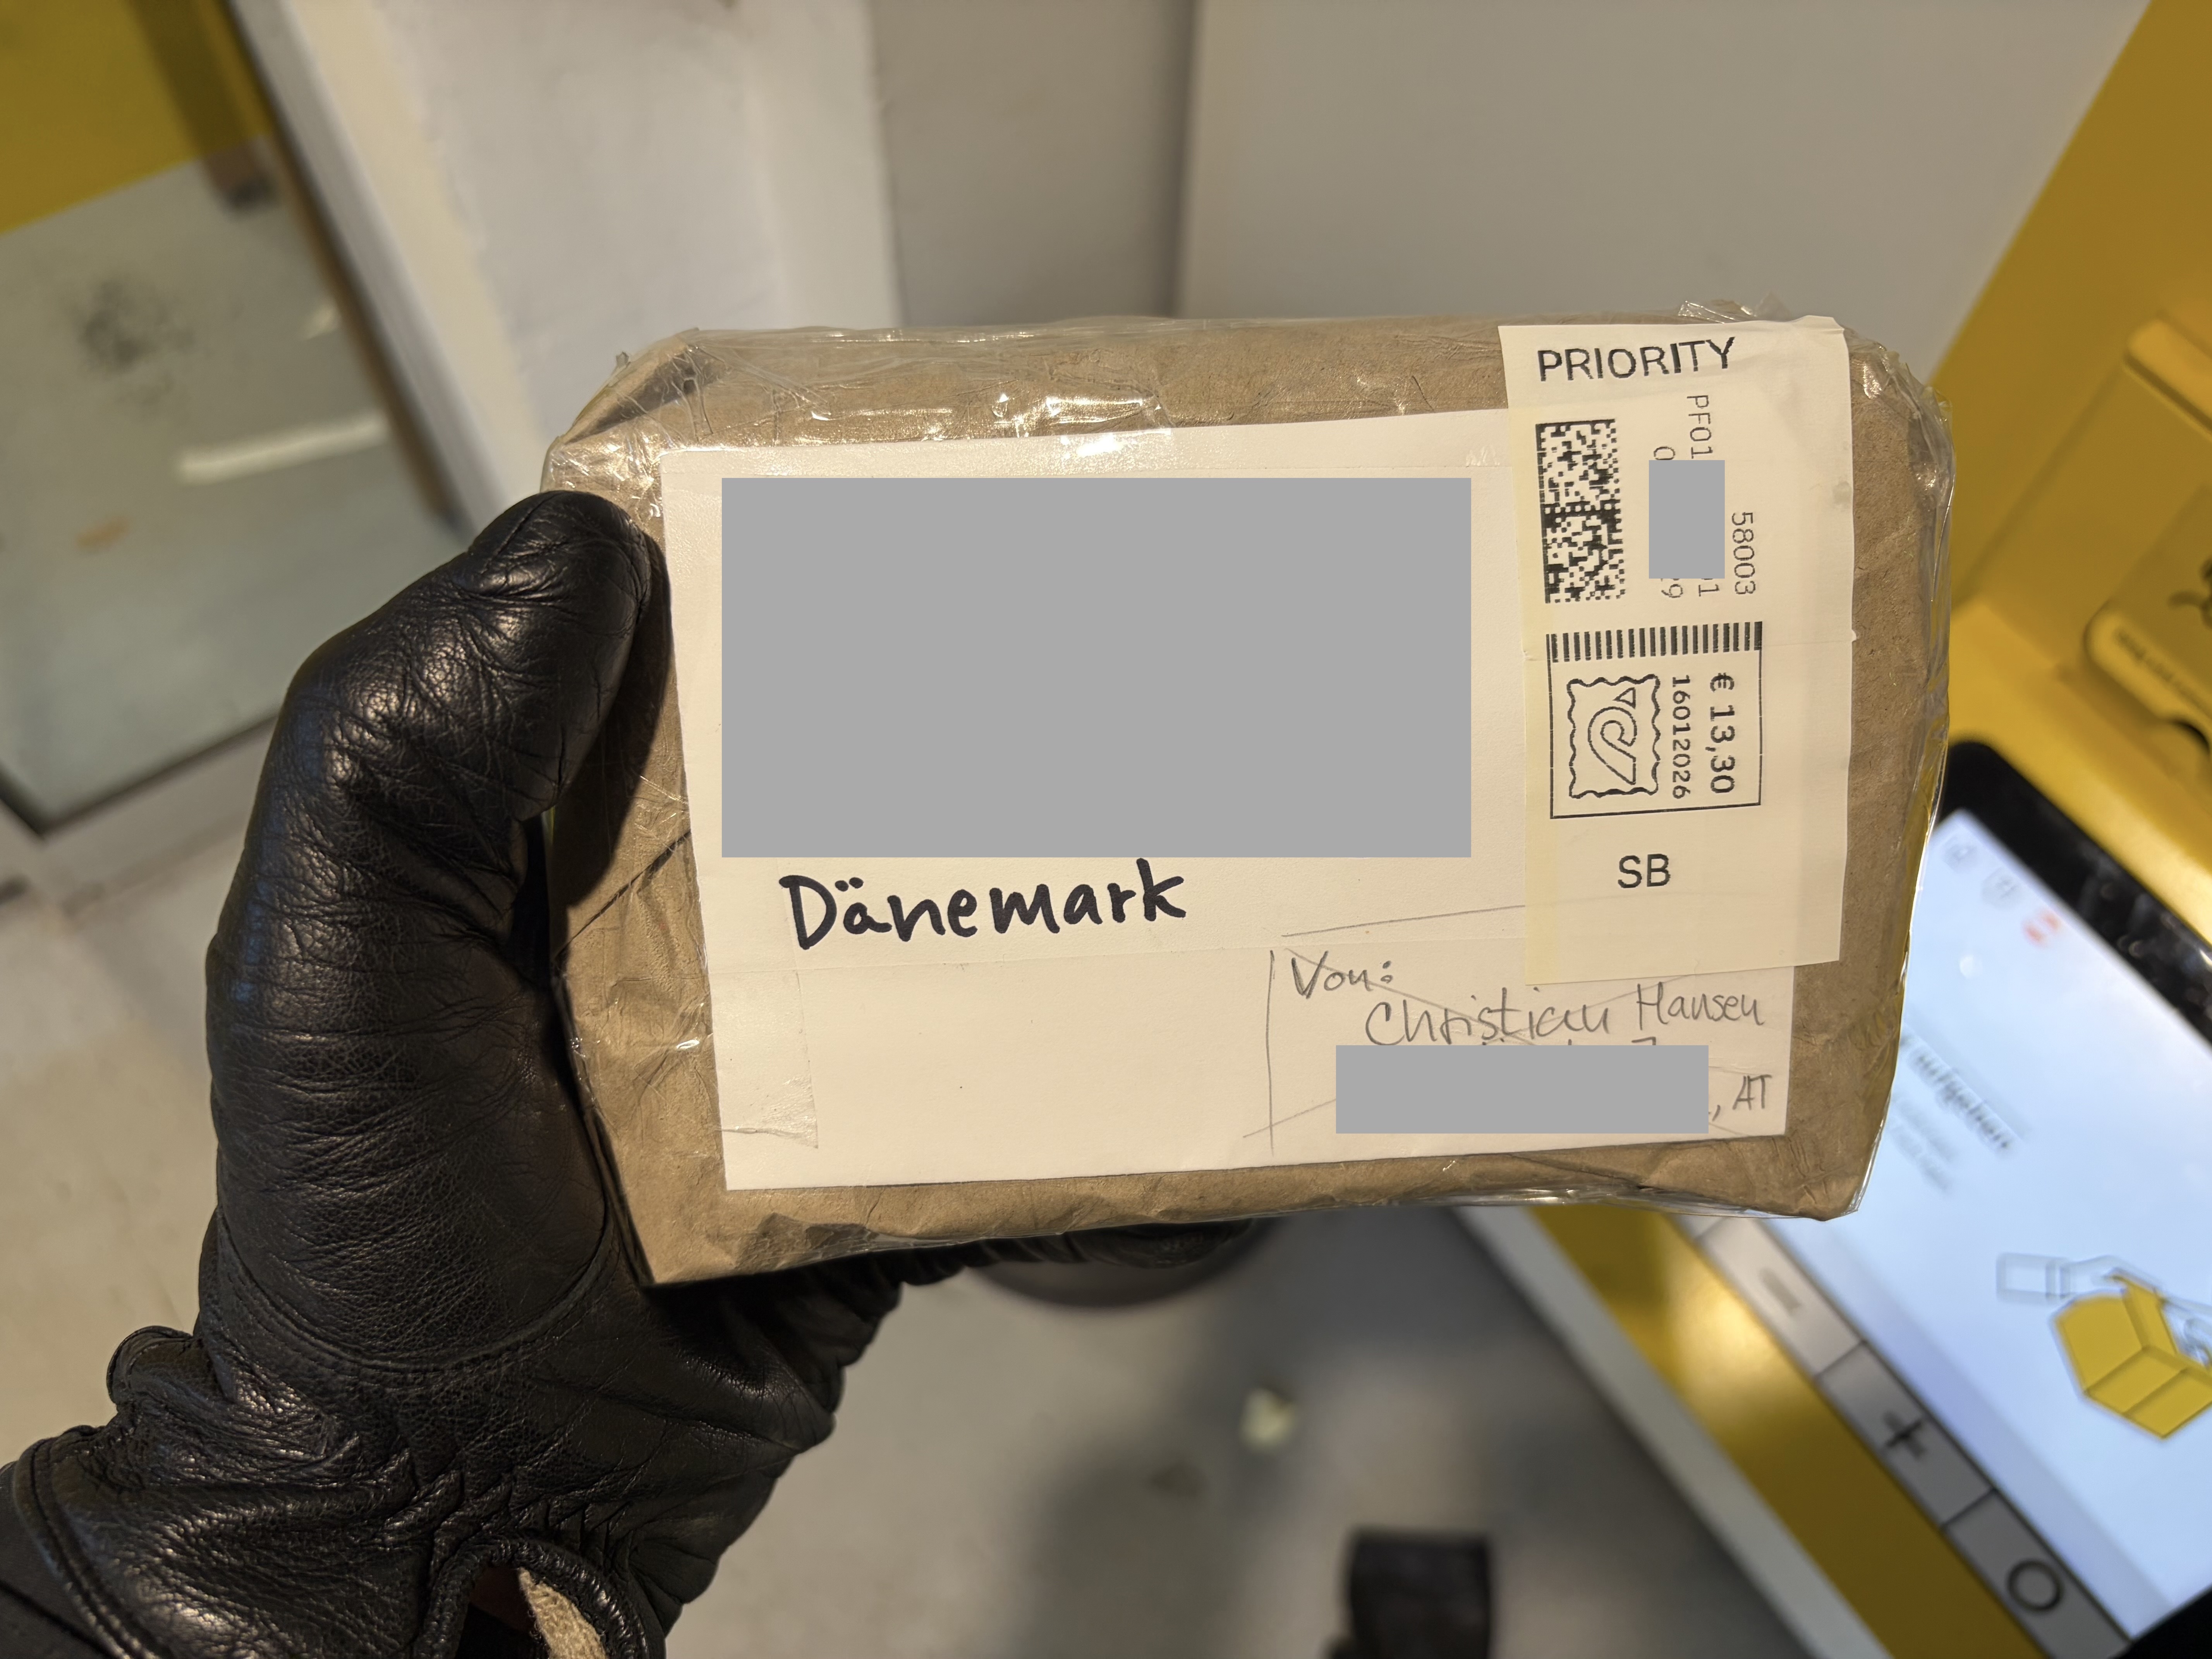
So I shipped it to Denmark!
5. Shipping
I obviously tried to make the package and myself look suspicious.
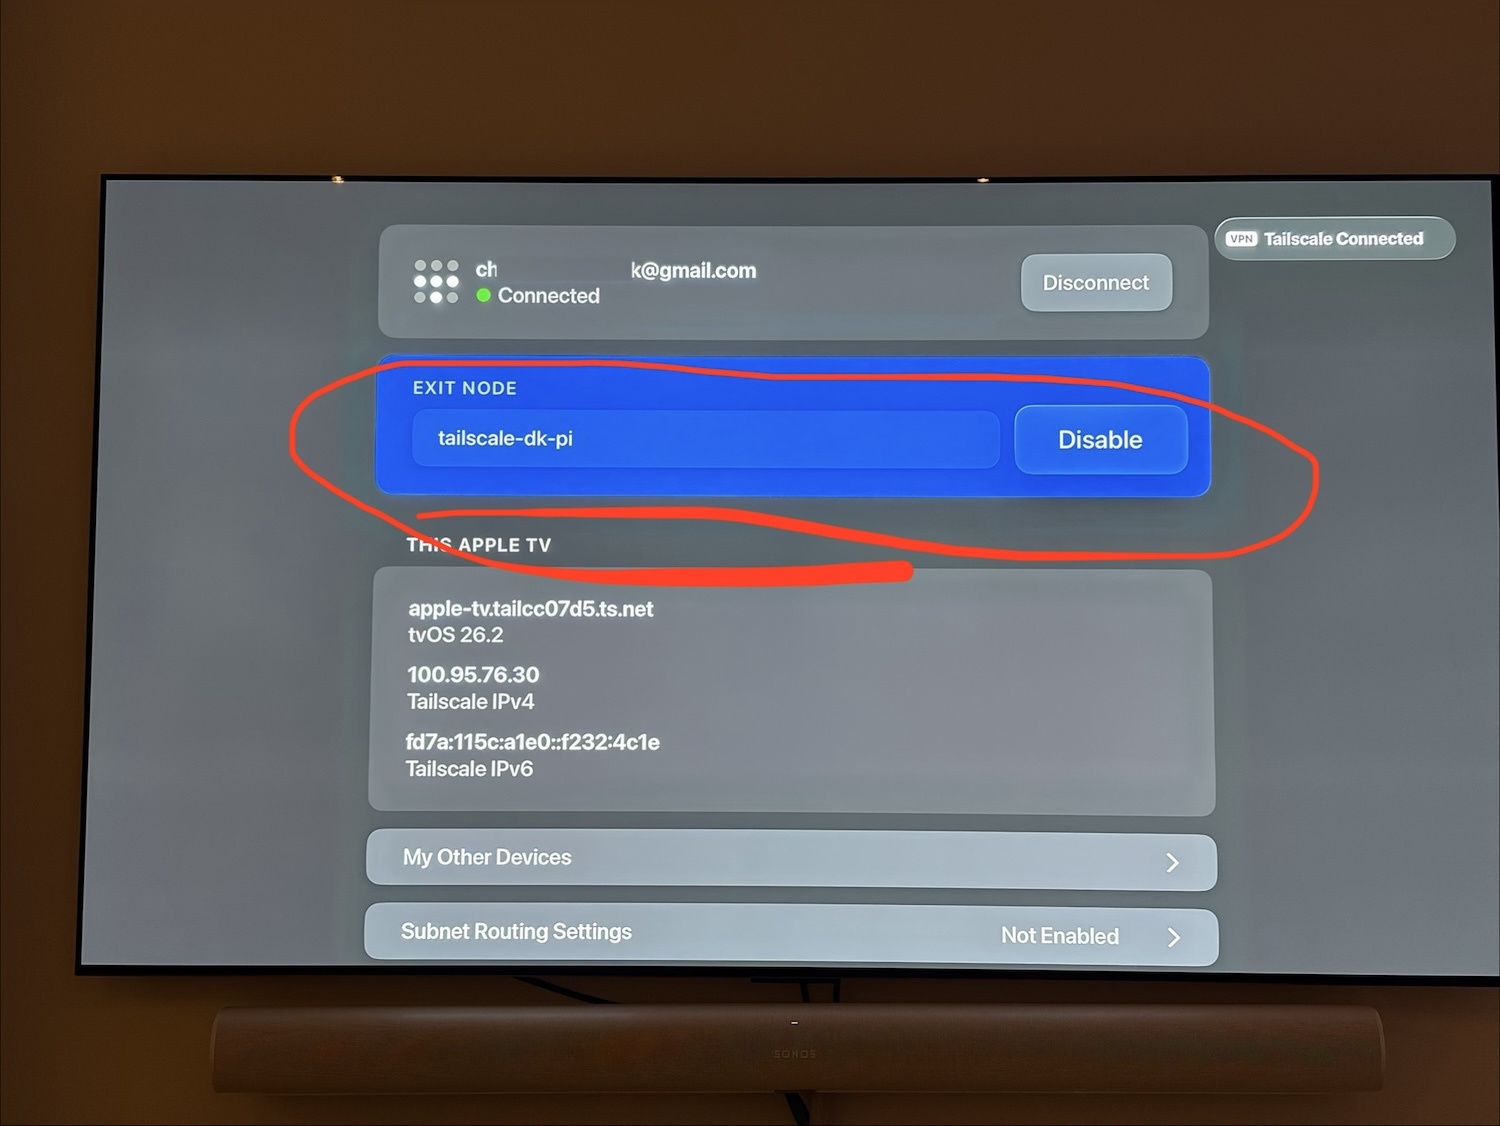
5. Couch Time
Wayyyy too many days later, my brother-in-law texted me that the Pi had arrived and been connected. And immediately I could see it live in the Tailscale app on my phone:
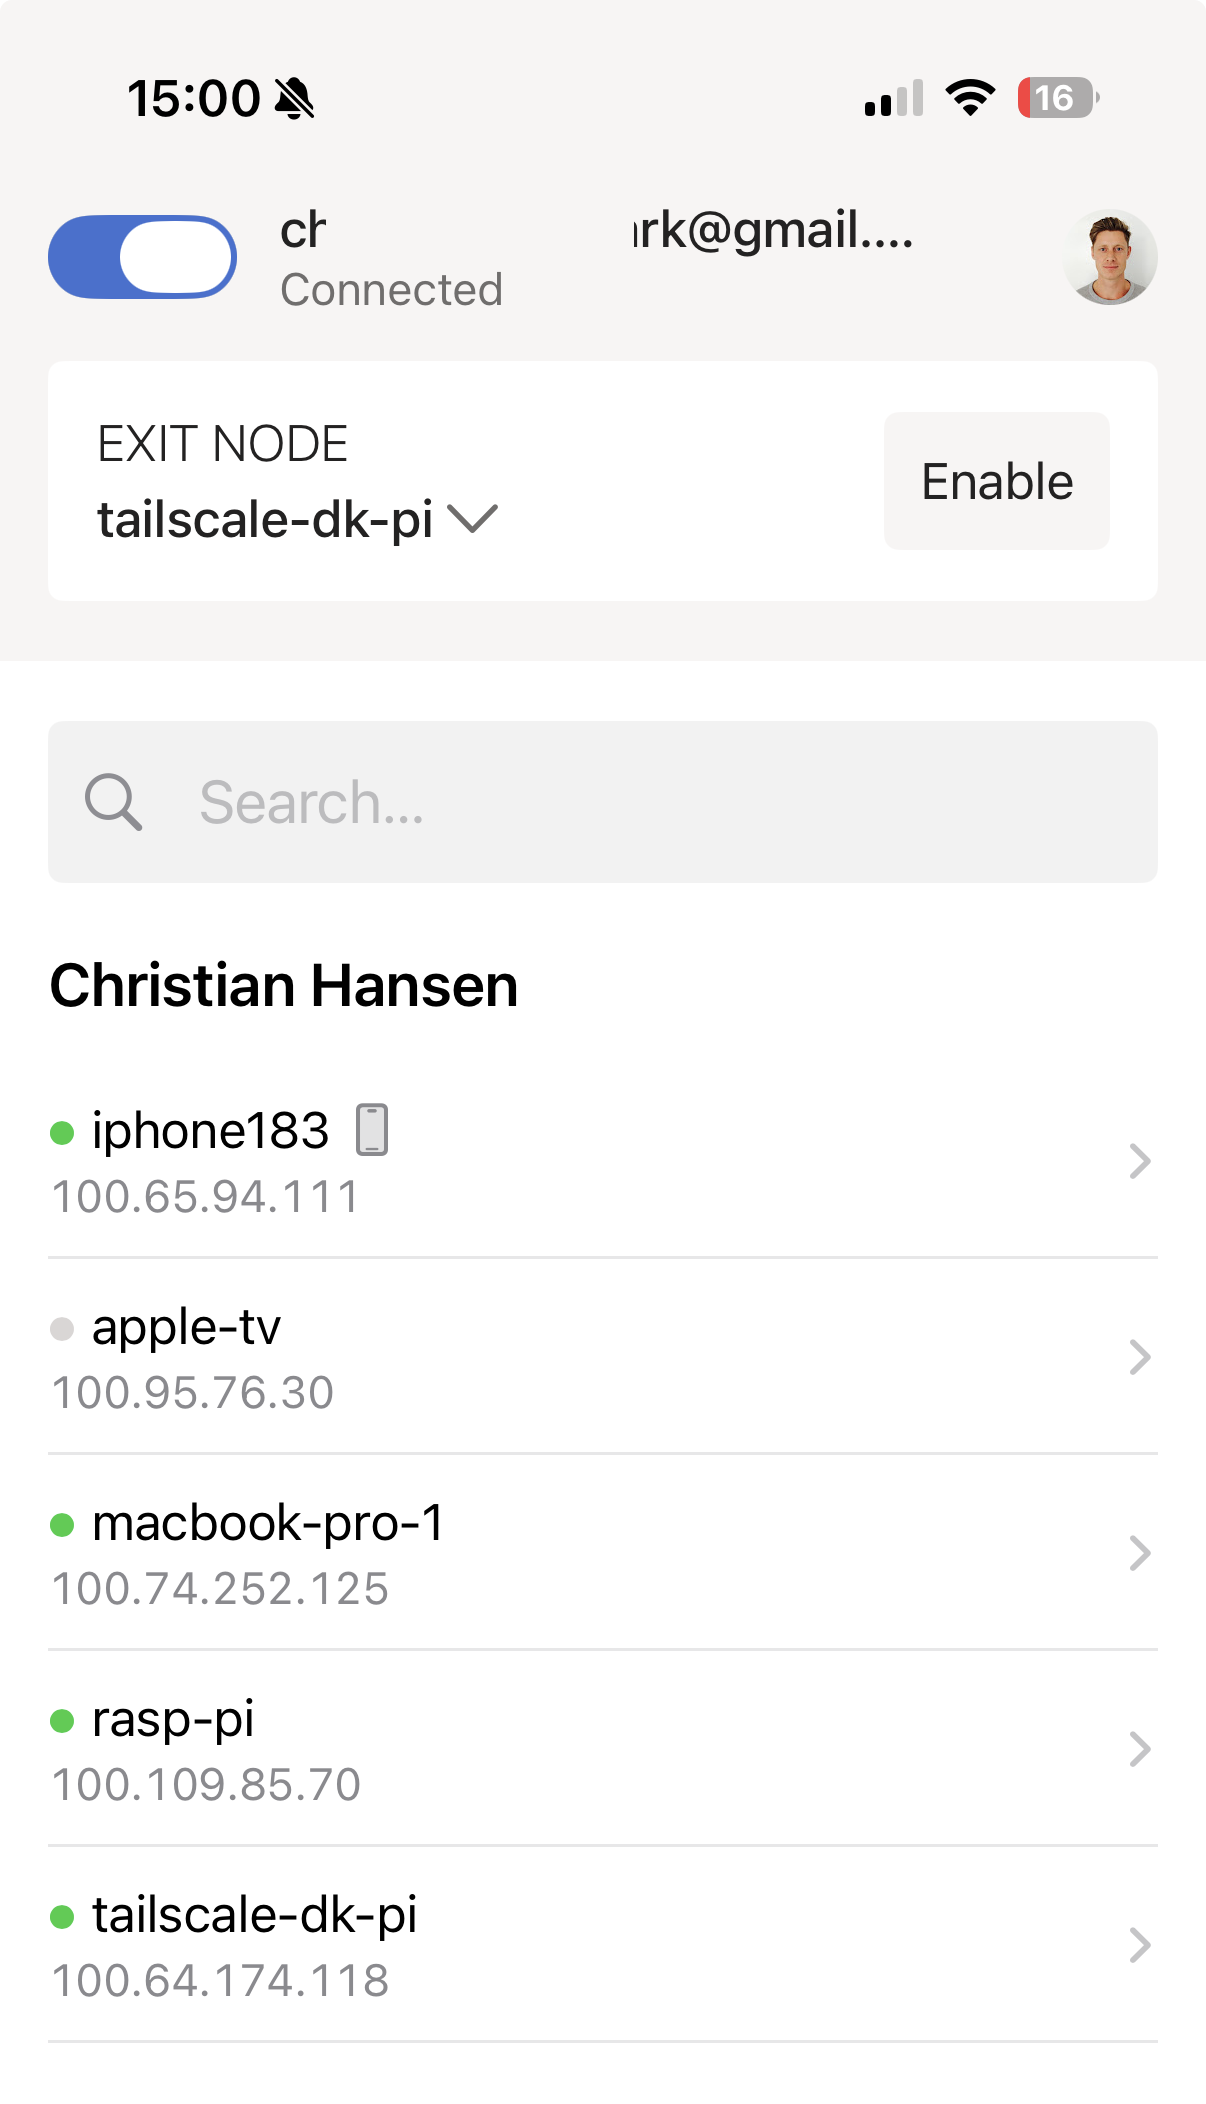
I turned on the TV ... and I was able to connect 🎉 !
Conclusion
It's now been 3 months and the Pi is still going strong. I'm not using it as much as I thought. Fun project, thought! And I decided to also get a Raspberry Pi for my own house, so that I'd always have a way to get on Austrian internet when abroad and so I could use it to play around with Openclaw.